Call us: +91-8160159928

Free shipping on all orders over ₹ 2999

how to replace laptop screen 2024

"Step-by-Step Guide: How to Replace a Laptop Screen Safely and Effectively"

Replacing a laptop screen requires careful handling and attention to detail. Here is a step-by-step guide to help you replace a laptop screen:

Note: Before you begin, make sure to turn off your laptop, unplug it from the power source, and remove the battery if possible.

1. Gather the necessary tools:

  • Small Phillips screwdriver
  • Flathead screwdriver or plastic pry tool
  • Replacement laptop screen
  • Anti-static wrist strap (optional but recommended)

We are providing these free tools with every screen sold on our website. 
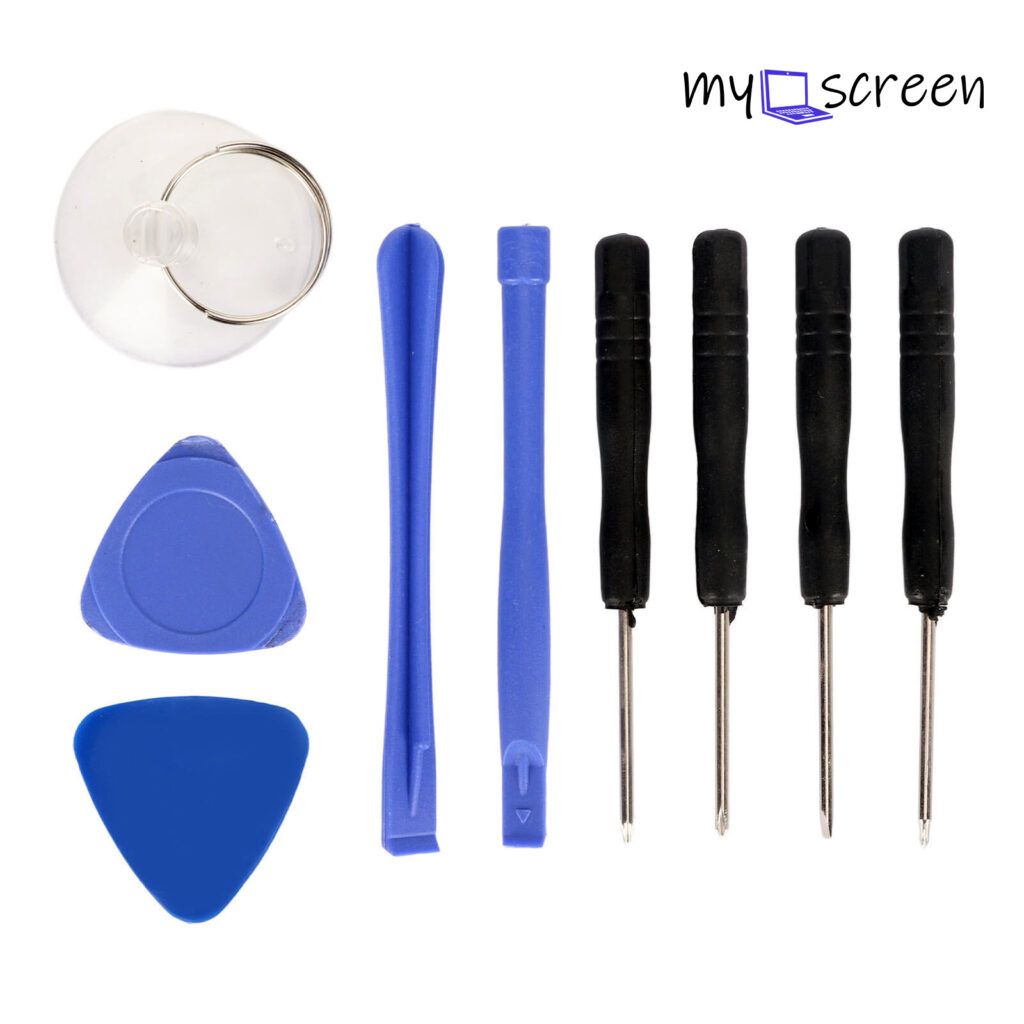
laptop screen replacement tool

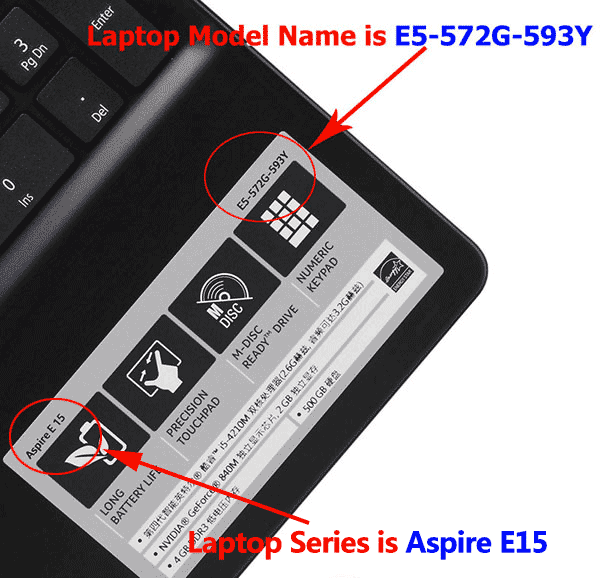
2. Identify the laptop model:

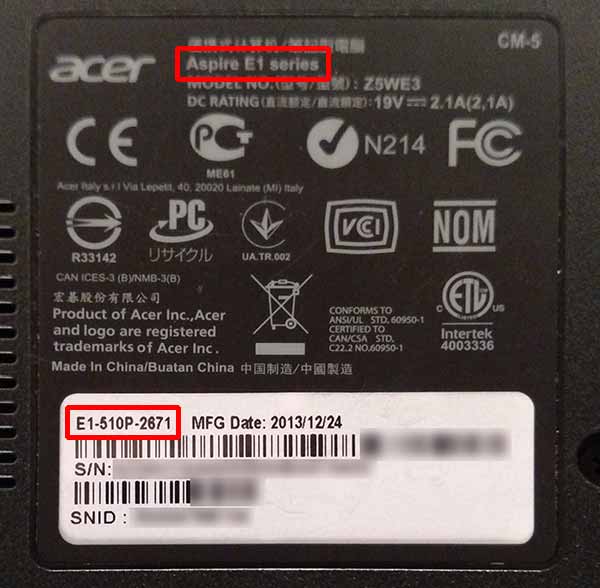
  • Check the Bottom of the Laptop:

    • Look for a sticker or label on the bottom of your laptop. The model number is often printed there, along with other information.
  • Check the Laptop’s Documentation:

    • Consult the user manual or any documentation that came with your laptop. The model number is typically mentioned in these materials.
  • Use System Information:

    • On Windows: Press Win + R to open the Run dialog, type msinfo32, and press Enter. Look for “System Model” under the System Information tab.
    • On macOS: Click the Apple logo in the top-left corner, select “About This Mac,” and find the model information.
how to find laptop model number - mylaptopscreen.com

Order a compatible replacement screen:

  • Search for a replacement screen using your laptop’s model number.
  • Ensure that the new screen is compatible in terms of size, resolution, and connector type.
Search

4. Prepare a clean workspace:

  • Choose a well-lit, clean, and spacious work area.
  • Lay a soft, non-abrasive surface (such as a cloth or towel) to place your laptop on.
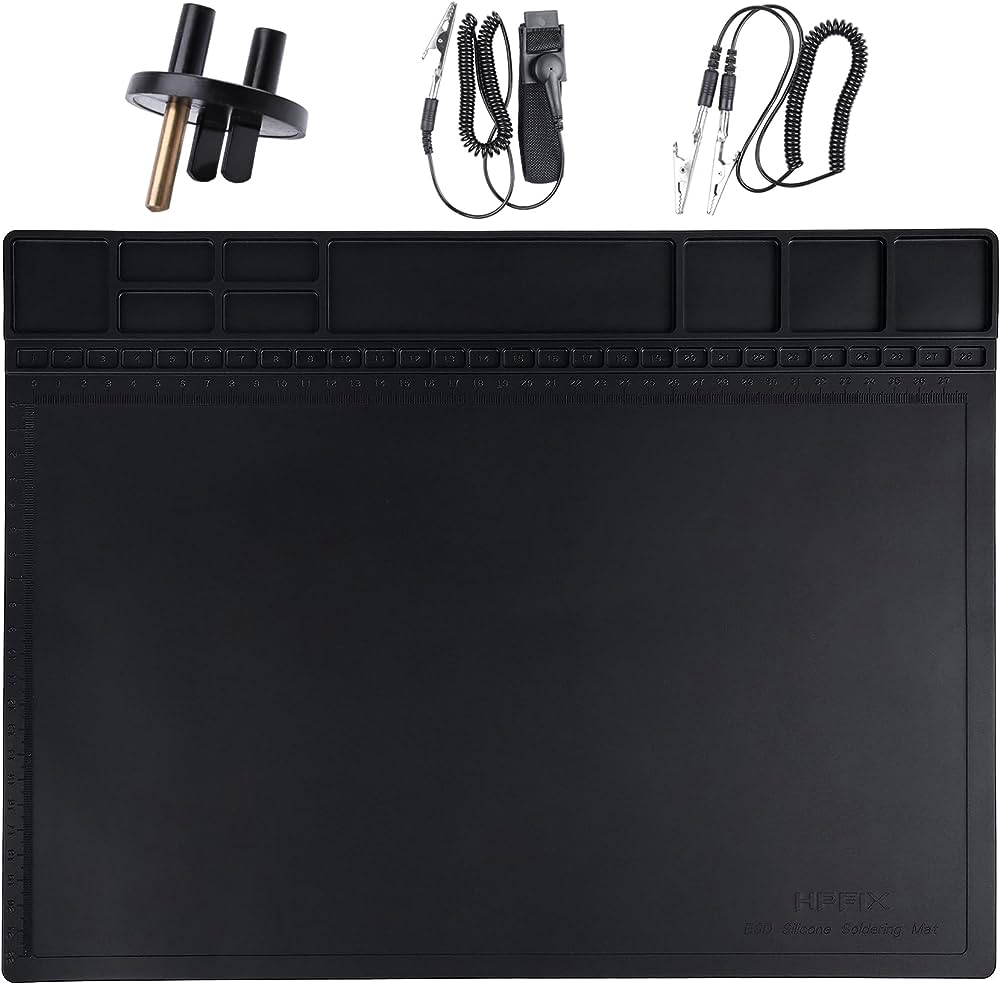
antistatic mat to replace laptop screen

5. Remove the bezel:

  • Use a flathead screwdriver or plastic pry tool to carefully remove the plastic bezel around the screen. Start from one corner and work your way around.
  • Be gentle to avoid damaging the bezel or the case.
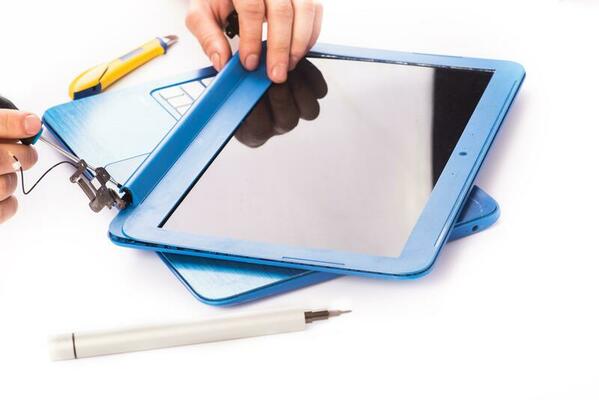
how to replace laptop screen

6. Remove the screws:

  • Locate and remove the screws securing the screen to the laptop. These are typically found along the sides of the screen or under rubber covers.
  • Keep track of the screws and their placements as they may differ in size.

7. Disconnect the screen:

  • Once the screws are removed, gently tilt the screen forward.
  • Locate the video cable connecting the screen to the laptop. Carefully disconnect it by releasing any clips or connectors.

8. Install the new screen:

  • Connect the video cable to the new screen, ensuring it is secure.
  • Align the new screen in place and reattach the screws.
  • Snap the bezel back into position.

9. Test the new screen:

  • Power on the laptop and check if the new screen displays properly.
  • If there are any issues, double-check the cable connections and the seating of the screen.

10. Reassemble the laptop:

  • Once you confirm the new screen is working, reassemble the laptop in the reverse order.
  • Tighten all screws securely, but be careful not to overtighten and damage the threads.

11. Clean the screen:

  • Use a soft, lint-free cloth to clean the new screen.
  • Avoid using harsh chemicals that may damage the display.

Remember to take your time and be patient during the process. If you’re unsure at any step, consult your laptop’s user manual or seek professional assistance.

Free shipping India

On all orders above Rs.2999

Easy 10 days returns

10 days money back guarantee

National Warranty

Offered in India only

100% Secure Checkout

PayPal / MasterCard / Visa

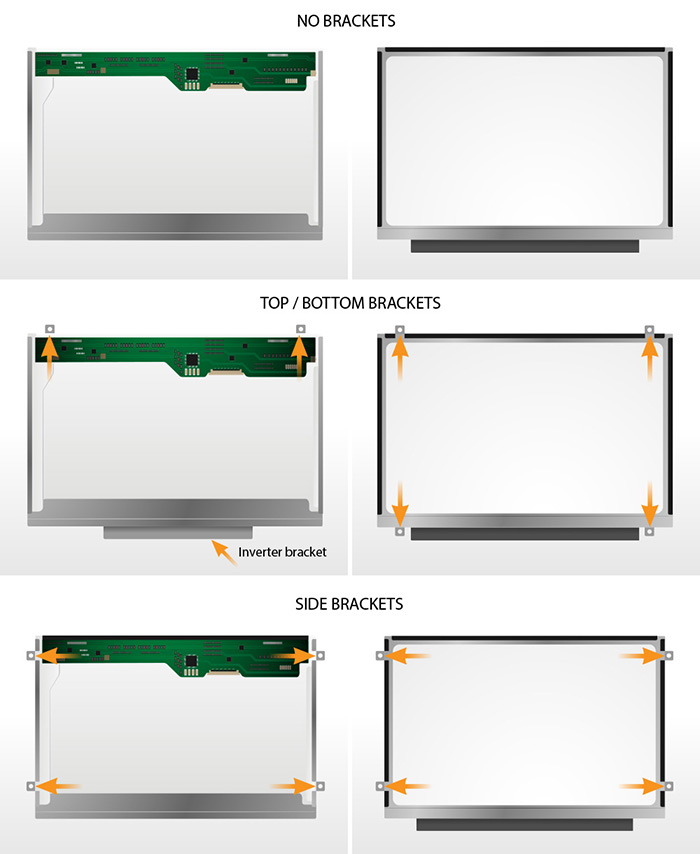
LCD Mounting and LCD brackets

Typical LCDs are mounted with 2, 3 or 4 screws on the left and the right side of the LCD.

Some LCDs are mounted via built-in brackets.

Important! All product images match the exact bracket configuration of a replacement screen that will be sent to you. LCD brackets are built onto the LCD module – don’t confuse them with the LCD mounting brackets that are part of a laptop and should be unscrewed from the LCD and reused during the reinstallation process.

Examples of LCD mountings:

lcd mounts on laptop screen

Screen connector

There are several different types of video connectors used in laptops screens. For the most part the connectors are not interchangeable. Here are the most common types of video connectors that are in use today:

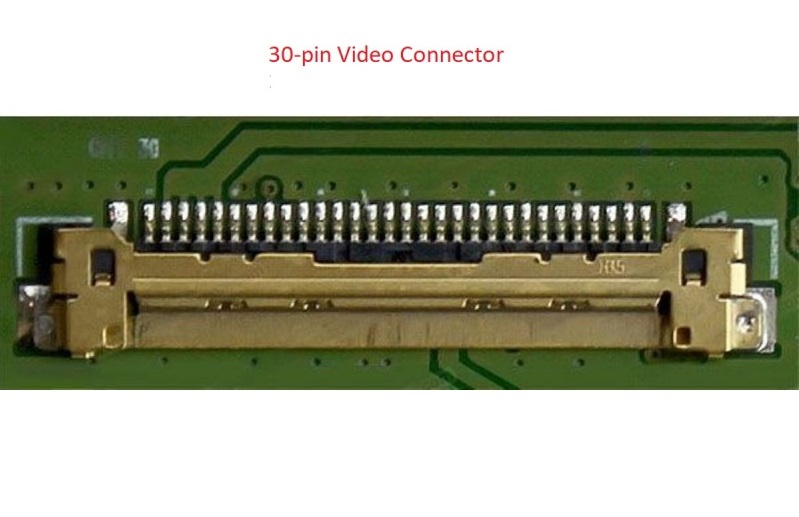
30-pin-lcd-screen-connector-mylaptospcreen.com

30-pin eDP – the main modern connector.
It is used on screens with resolutions up to 1920 x 1080. If your laptop was manufactured after 2014 and features screen resolution up to 1080p it is likely using this type of connector.

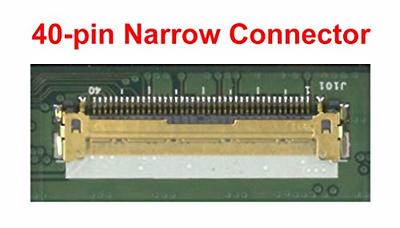
40-pin-narrow-connector-laptop-screen-
40-pin Narrow Connector
40-pin touch interface and eDP video connector used on some Lenovo laptops starting from 2020.

Narrow 40pin – pitch 0.4mm (found in Lenovo OnCell touch)
Regular 40pin – pitch 0.5mm
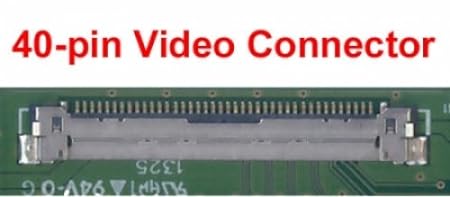
40-pin-connector

40-pin same physical connector standard but 3 different and incompatible signals

40-pin eDP Touch – used on newer laptops after 2015, the additional pins over the 30-pin eDP connector are needed for a built-in (on-cell) touchscreen functionality.

40-pin eDP QHD+ – used on newer laptops after 2015, the additional pins over the 30-pin eDP connector are needed for higher resolution options such as QHD (2560 x 1440) and even higher (4 channel eDP).

“40-pin eDP Touch” LCDs are not interchangeable with “40-pin eDP QHD+” screens. Even though the connectors are the same, plugging a “40-pin eDP Touch” LCD in-place of a “40-pin eDP QHD+” screen will not provide the touch functionality, and vice-versa, plugging a QHD screen in place of a 40-pin touchscreen will not provide higher resolution.

40-pin LVDS (old)

Used on most LED back-lit laptops prior to 2014. It was the most common standard at the time and allowed resolutions up to 1920 x 1080p.
Screens fitted with 40-pin LVDS connector are not interchangeable with screens fitted with 40-pin eDP because of the two different signalling technologies, even-though the connectors follow identical physical standards.


Other

120Hz+ LVDS (gaming) screens used a 50-pin connector
CCFL screens (obsolete) used 20-pin LVDS and 30-pin LVDS connectors.
MacBooks use their own proprietary LVDS and eDP connector types.

How to find screen resolution

It is important to confirm the screen resolution before submitting an order: the same laptop model can come with different display resolutions.

how to find laptop screen resolution

If a laptop you are ordering a screen for works – turn it on and:

– go to On-line Resolution Check

OR

– for Windows XP, Windows 2000, Windows ME, Windows 98: Right-Click on Desktop -> Properties -> then in Display Properties navigate to Settings
– for Windows 10 and Windows 7 & Vista: Right-Click on Desktop -> Personalize -> Graphics Options

If a laptop you ordering a screen for is not functional:

– we recommend to pull your defective screen out and google screen model for specifications. You can find the screen model number on the sticker on the back of the screen. Check out our How to check your LCD screen model number article.

OR

– check your laptop manual under the laptop specifications section if you have one.

OR

– also you may be able to find you laptop specifications on manufacturers website using the laptop serial number, service tag or the model number (in Support section).

Letters on the right are the common abbreviations and can be used as resolution indicators.

3840 x 2160 (UHD) 4K
3200 x 1800 (QHD+)
3000 x 2000 (PixelSense, MS Only)
2880×1800 (Retina, Apple only)
2560×1600 (Retina, Apple only)
2560 x 1440 (QHD / WQHD) 2K
2304 × 1440 (Retina, Apple only)
2048 x 1536 (QXGA)
1920 x 1200 (WUXGA)
1920 x 1080 (WUXGA) Full HD
1680 x 1050 (WSXGA+)
1680 x 945 (WSXGA+)
1680 x 900 (WSXGA+)
1600 x 900 (WXGA++) HD+
1600 x 1200 (UXGA)
1440 x 960 (WXGA+)
1440 x 900 (WXGA+)
1400 x 1050 (SXGA)
1366 x 768 (WXGA) HD
1280 x 1024 (SXGA)
1280 x 720 (SD+)
1280 x 854 (WXGA)
1280 x 800 (WXGA)
1280 x 768 (WXGA)
1152 x 768 (WXGA)
1024 x 768 (XGA, outdated)
1024 x 600 (WSVGA, outdated)
1024 x 576 (WSVGA, outdated)
800 x 600 (SVGA, outdated)
640 x 480 (VGA, outdated)

How to measure laptop screen size

laptop screen size how to check

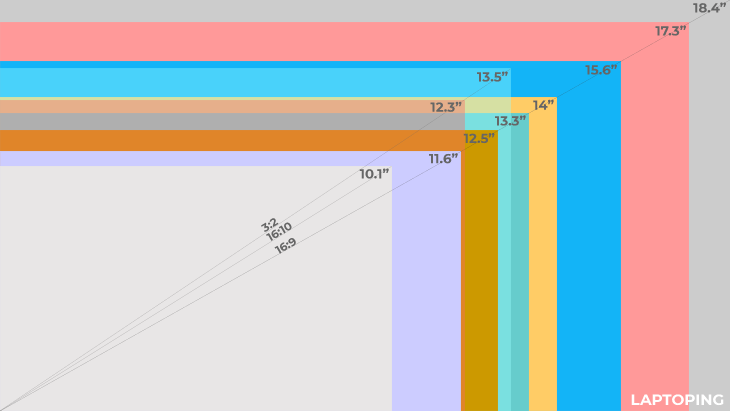
Laptop screens vary in size and new sizes are frequently introduced. See the most common sizes below. Screen size is measured in inches, diagonally from corner to corner (1 inch=2.54 cm) as shown in the video below: