
"Step-by-Step Guide: How to Replace a Laptop Screen Safely and Effectively"
Replacing a laptop screen requires careful handling and attention to detail. Here is a step-by-step guide to help you replace a laptop screen:
Note: Before you begin, make sure to turn off your laptop, unplug it from the power source, and remove the battery if possible.
1. Gather the necessary tools:
- Small Phillips screwdriver
- Flathead screwdriver or plastic pry tool
- Replacement laptop screen
- Anti-static wrist strap (optional but recommended)
We are providing these free tools with every screen sold on our website.

2. Identify the laptop model:
-
-
Check the Bottom of the Laptop:
- Look for a sticker or label on the bottom of your laptop. The model number is often printed there, along with other information.
-
Check the Laptop’s Documentation:
- Consult the user manual or any documentation that came with your laptop. The model number is typically mentioned in these materials.
-
Use System Information:
- On Windows: Press
Win + Rto open the Run dialog, typemsinfo32, and press Enter. Look for “System Model” under the System Information tab. - On macOS: Click the Apple logo in the top-left corner, select “About This Mac,” and find the model information.
- On Windows: Press


Order a compatible replacement screen:
- Search for a replacement screen using your laptop’s model number.
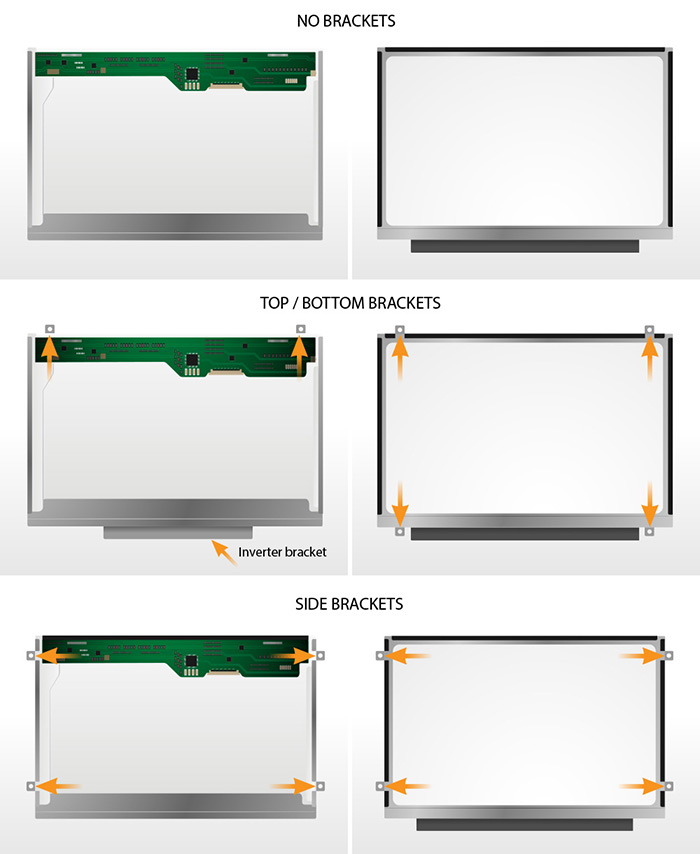
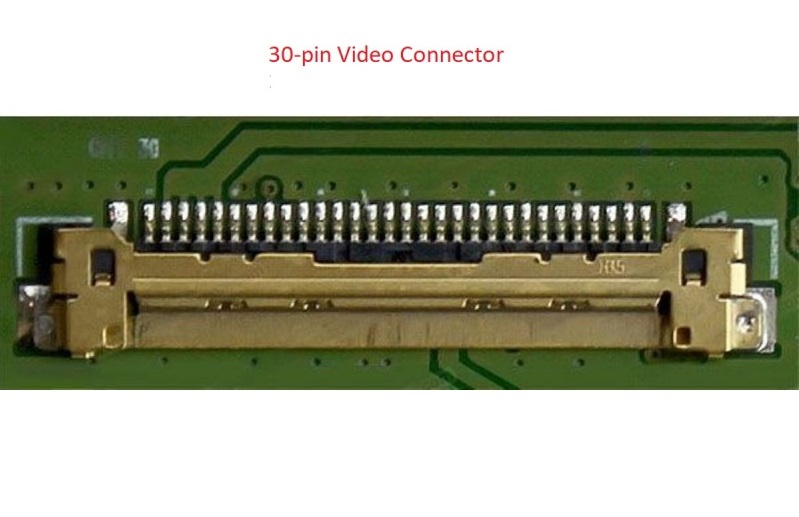
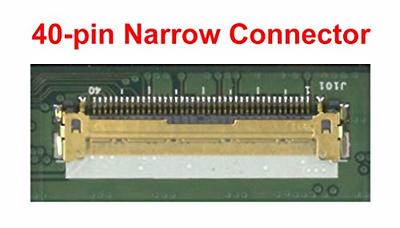
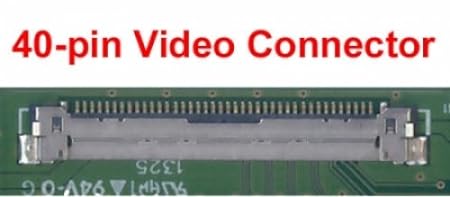
- Ensure that the new screen is compatible in terms of size, resolution, and connector type.
4. Prepare a clean workspace:
- Choose a well-lit, clean, and spacious work area.
- Lay a soft, non-abrasive surface (such as a cloth or towel) to place your laptop on.

5. Remove the bezel:
- Use a flathead screwdriver or plastic pry tool to carefully remove the plastic bezel around the screen. Start from one corner and work your way around.
- Be gentle to avoid damaging the bezel or the case.

6. Remove the screws:
- Locate and remove the screws securing the screen to the laptop. These are typically found along the sides of the screen or under rubber covers.
- Keep track of the screws and their placements as they may differ in size.
7. Disconnect the screen:
- Once the screws are removed, gently tilt the screen forward.
- Locate the video cable connecting the screen to the laptop. Carefully disconnect it by releasing any clips or connectors.
8. Install the new screen:
- Connect the video cable to the new screen, ensuring it is secure.
- Align the new screen in place and reattach the screws.
- Snap the bezel back into position.
9. Test the new screen:
- Power on the laptop and check if the new screen displays properly.
- If there are any issues, double-check the cable connections and the seating of the screen.
10. Reassemble the laptop:
- Once you confirm the new screen is working, reassemble the laptop in the reverse order.
- Tighten all screws securely, but be careful not to overtighten and damage the threads.
11. Clean the screen:
- Use a soft, lint-free cloth to clean the new screen.
- Avoid using harsh chemicals that may damage the display.
Remember to take your time and be patient during the process. If you’re unsure at any step, consult your laptop’s user manual or seek professional assistance.