Call us: +91-8160159928

Free shipping on all orders over ₹ 2999

dell laptop screen

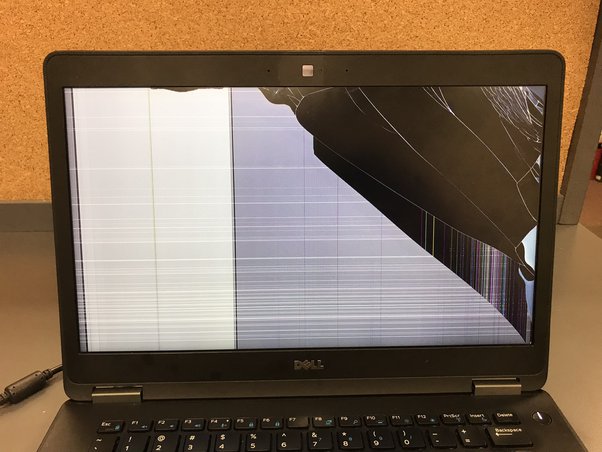
Cracked or Broken Dell Laptop Screen? Get It Fixed Without Breaking the Bank!

A cracked or broken Dell laptop screen can be a major bummer. It halts your productivity, throws a wrench in your workflow, and can leave you feeling helpless. But fear not, fellow Dell user! You don’t have to shell out a fortune for a brand new laptop or settle for subpar repairs.

This handy guide will equip you with all the knowledge you need to navigate the world of Dell laptop screen replacements, from understanding pricing to finding the best repair options. So, grab a cup of coffee, ditch the panic, and let’s get your Dell back in tip-top shape!

Understanding Dell Laptop Screen Prices

First things first, let’s address the elephant in the room: cost. Dell laptop screen replacements can vary in price depending on several factors, including:

  • Laptop model: Different Dell models use different screens, and some are naturally more expensive than others. For example, a screen for a high-end XPS model will likely cost more than one for a budget-friendly Inspiron.
  • Screen type: Touchscreens, high-resolution displays, and OLED panels typically come with a higher price tag than standard HD screens.
  • Replacement parts: You can choose between genuine Dell parts and compatible third-party options. While genuine parts offer guaranteed quality and compatibility, they tend to be more expensive.

Here’s a rough estimate of Dell laptop screen replacement costs:

  • Basic HD screen: Rs. 3,000 to Rs. 5,000
  • Full HD screen: Rs. 5,000 to Rs. 8,000
  • Touchscreen: Rs. 8,000 to Rs. 12,000
  • High-resolution/OLED: Rs. 12,000 and above

Remember, these are just ballpark figures. The actual cost will depend on your specific Dell model and screen type.

Finding the Best Dell Laptop Screen Replacement Options

Now that you have a handle on pricing, let’s explore your options for getting your Dell screen fixed:

  • Dell Official Service: Dell offers professional repair services, but they can be expensive, especially for out-of-warranty laptops.
  • Authorized Dell repair centers: These centers are certified by Dell and use genuine parts, but they may not be as readily available as independent repair shops.
  • Independent repair shops: Many local repair shops can fix Dell laptops at a fraction of the cost of official Dell services. Just make sure they have a good reputation and use quality parts.
  • DIY replacement: If you’re tech-savvy, you can purchase a compatible replacement screen online and replace it yourself. However, this is not recommended for everyone, as it can be tricky and void your warranty.

Pro Tip: Before committing to any repair option, compare prices and get quotes from different providers. Don’t be afraid to negotiate, especially with independent repair shops.

Additional Tips for Dell Laptop Screen Repair

  • Back up your data! Before any repairs begin, make sure to back up your important data to an external drive or cloud storage.
  • Ask about warranties: Make sure the repair comes with a warranty on both parts and labor.
  • Keep your receipt: You’ll need this for warranty claims and insurance purposes.

With a little knowledge and some smart decision-making, you can get your cracked Dell laptop screen fixed without breaking the bank. So, don’t wait any longer, get your Dell back in action and reclaim your productivity!

Bonus: As a parting gift, here are some helpful resources for finding Dell laptop screen replacements and repair options:

I hope this article has been informative and helpful. If you have any questions, please feel free to leave a comment below.

Happy repairing!

Leave a Reply

Your email address will not be published. Required fields are marked *

Free shipping India

On all orders above Rs.2999

Easy 10 days returns

10 days money back guarantee

National Warranty

Offered in India only

100% Secure Checkout

PayPal / MasterCard / Visa

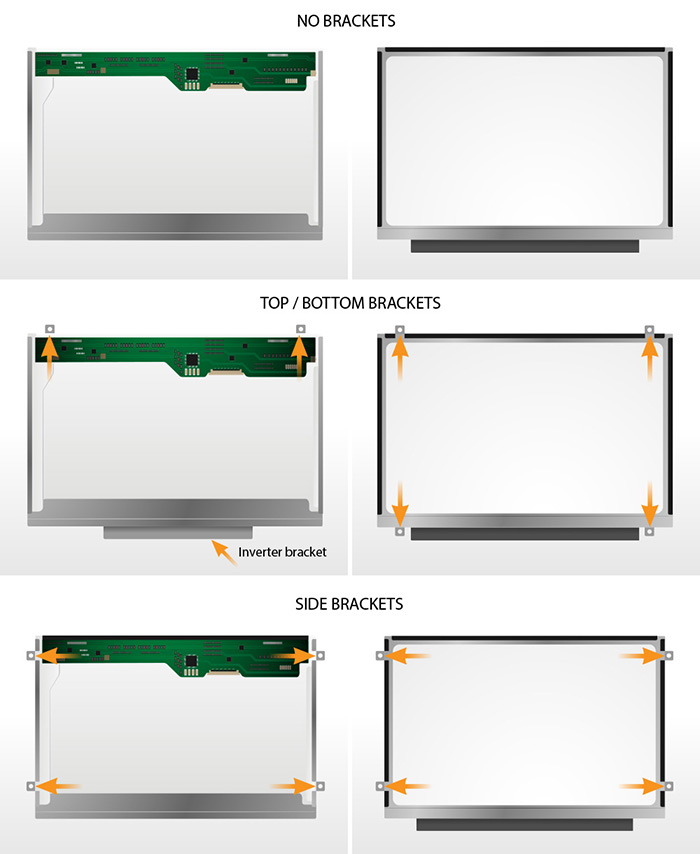
LCD Mounting and LCD brackets

Typical LCDs are mounted with 2, 3 or 4 screws on the left and the right side of the LCD.

Some LCDs are mounted via built-in brackets.

Important! All product images match the exact bracket configuration of a replacement screen that will be sent to you. LCD brackets are built onto the LCD module – don’t confuse them with the LCD mounting brackets that are part of a laptop and should be unscrewed from the LCD and reused during the reinstallation process.

Examples of LCD mountings:

lcd mounts on laptop screen

Screen connector

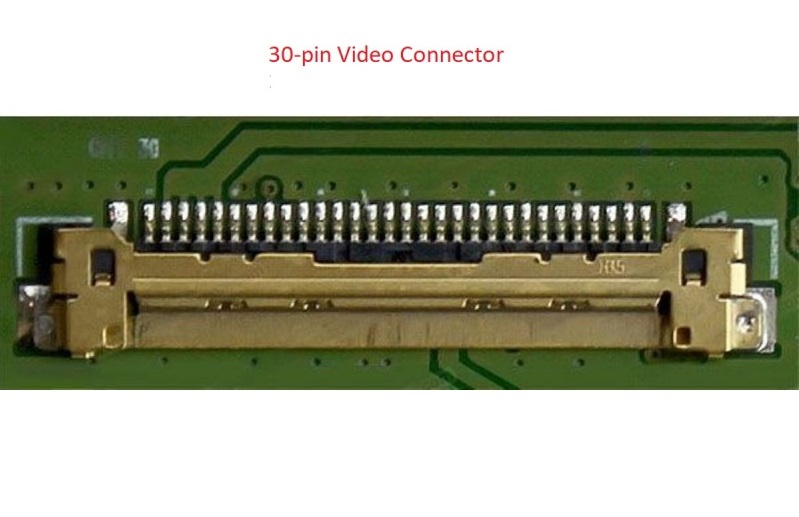
There are several different types of video connectors used in laptops screens. For the most part the connectors are not interchangeable. Here are the most common types of video connectors that are in use today:

30-pin-lcd-screen-connector-mylaptospcreen.com

30-pin eDP – the main modern connector.
It is used on screens with resolutions up to 1920 x 1080. If your laptop was manufactured after 2014 and features screen resolution up to 1080p it is likely using this type of connector.

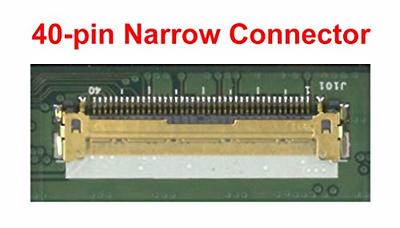
40-pin-narrow-connector-laptop-screen-
40-pin Narrow Connector
40-pin touch interface and eDP video connector used on some Lenovo laptops starting from 2020.

Narrow 40pin – pitch 0.4mm (found in Lenovo OnCell touch)
Regular 40pin – pitch 0.5mm
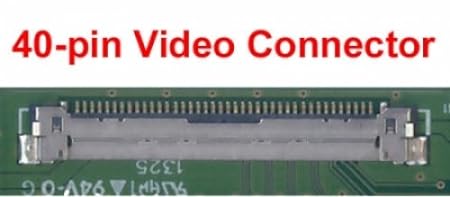
40-pin-connector

40-pin same physical connector standard but 3 different and incompatible signals

40-pin eDP Touch – used on newer laptops after 2015, the additional pins over the 30-pin eDP connector are needed for a built-in (on-cell) touchscreen functionality.

40-pin eDP QHD+ – used on newer laptops after 2015, the additional pins over the 30-pin eDP connector are needed for higher resolution options such as QHD (2560 x 1440) and even higher (4 channel eDP).

“40-pin eDP Touch” LCDs are not interchangeable with “40-pin eDP QHD+” screens. Even though the connectors are the same, plugging a “40-pin eDP Touch” LCD in-place of a “40-pin eDP QHD+” screen will not provide the touch functionality, and vice-versa, plugging a QHD screen in place of a 40-pin touchscreen will not provide higher resolution.

40-pin LVDS (old)

Used on most LED back-lit laptops prior to 2014. It was the most common standard at the time and allowed resolutions up to 1920 x 1080p.
Screens fitted with 40-pin LVDS connector are not interchangeable with screens fitted with 40-pin eDP because of the two different signalling technologies, even-though the connectors follow identical physical standards.


Other

120Hz+ LVDS (gaming) screens used a 50-pin connector
CCFL screens (obsolete) used 20-pin LVDS and 30-pin LVDS connectors.
MacBooks use their own proprietary LVDS and eDP connector types.

How to find screen resolution

It is important to confirm the screen resolution before submitting an order: the same laptop model can come with different display resolutions.

how to find laptop screen resolution

If a laptop you are ordering a screen for works – turn it on and:

– go to On-line Resolution Check

OR

– for Windows XP, Windows 2000, Windows ME, Windows 98: Right-Click on Desktop -> Properties -> then in Display Properties navigate to Settings
– for Windows 10 and Windows 7 & Vista: Right-Click on Desktop -> Personalize -> Graphics Options

If a laptop you ordering a screen for is not functional:

– we recommend to pull your defective screen out and google screen model for specifications. You can find the screen model number on the sticker on the back of the screen. Check out our How to check your LCD screen model number article.

OR

– check your laptop manual under the laptop specifications section if you have one.

OR

– also you may be able to find you laptop specifications on manufacturers website using the laptop serial number, service tag or the model number (in Support section).

Letters on the right are the common abbreviations and can be used as resolution indicators.

3840 x 2160 (UHD) 4K
3200 x 1800 (QHD+)
3000 x 2000 (PixelSense, MS Only)
2880×1800 (Retina, Apple only)
2560×1600 (Retina, Apple only)
2560 x 1440 (QHD / WQHD) 2K
2304 × 1440 (Retina, Apple only)
2048 x 1536 (QXGA)
1920 x 1200 (WUXGA)
1920 x 1080 (WUXGA) Full HD
1680 x 1050 (WSXGA+)
1680 x 945 (WSXGA+)
1680 x 900 (WSXGA+)
1600 x 900 (WXGA++) HD+
1600 x 1200 (UXGA)
1440 x 960 (WXGA+)
1440 x 900 (WXGA+)
1400 x 1050 (SXGA)
1366 x 768 (WXGA) HD
1280 x 1024 (SXGA)
1280 x 720 (SD+)
1280 x 854 (WXGA)
1280 x 800 (WXGA)
1280 x 768 (WXGA)
1152 x 768 (WXGA)
1024 x 768 (XGA, outdated)
1024 x 600 (WSVGA, outdated)
1024 x 576 (WSVGA, outdated)
800 x 600 (SVGA, outdated)
640 x 480 (VGA, outdated)

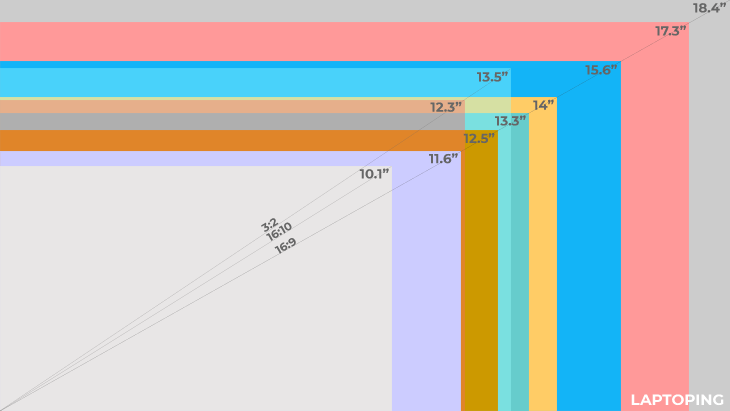
How to measure laptop screen size

laptop screen size how to check

Laptop screens vary in size and new sizes are frequently introduced. See the most common sizes below. Screen size is measured in inches, diagonally from corner to corner (1 inch=2.54 cm) as shown in the video below: